
Hi -- Heather (isaacsmom) here. Today I'm going to share with you how to make some fabulous spring cards with one of the fun products that Krisi released last week at Scrap Orchard: Shaped Cards {Spring}. You can find it in the store here.
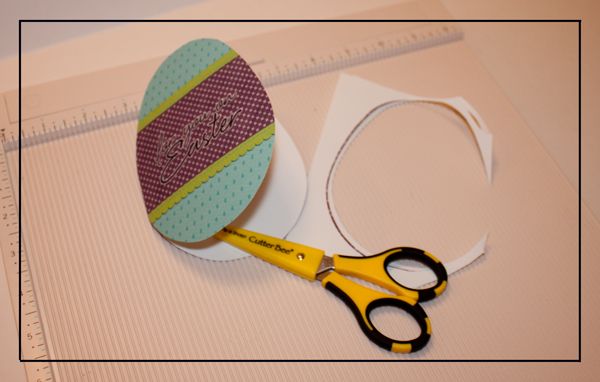
So first off, you choose which one of the cards you want to make, and open the file in your editing program -- I use PSE 10. This template comes in several file forms to suit lots of different needs. For this project, I used the .tiff file. I opened the digital papers I wanted to use and decorated the template. For the egg shaped card, I used the greeting "for you on Easter" which can be found in Krisi's pack of Write It: Spring Sentiments found here. Once I had the templates decorated in my photo editing program, I went ahead and printed them out. The next step is to cut them out. One of the things I found to be helpful with these shaped cards, was to actually score and fold my card before I started actually cutting out the shape. This helped the cutting process go quicker as well.

I always use my Cutter Bee scissors when cutting out my hybrid items. I love how sharp it is and also with the small blade, I can get into the little corners easier.
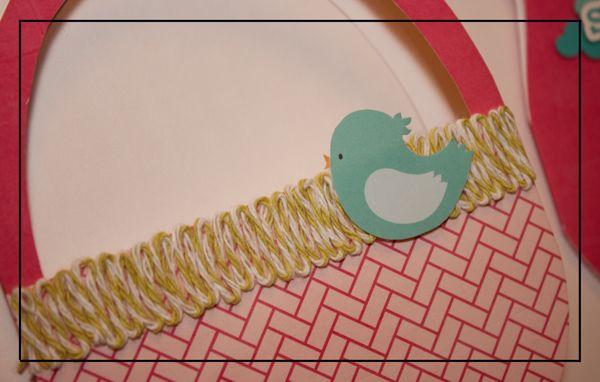
Once all of my cards were cut out, now we are ready for the fun part -- the embellishment. You will see in my examples shown below, I used several different items to finish off my cards. The first one here - the basket shaped card, I used some red line tape (double-sided very sticky tape) and made one stripe of the tape across the front of my card.

Then, I removed the red part of the tape to expose the other side of the sticky tape. I then took bakers twine and weaved a row of twine back and forth all along the strip of tape to create an effect of grass in the basket.

When I was finished, I used a glue dot to glue on a little digital bird that I had also printed and cut out. It really adds dimension to your card when you create things in layers like this. So, I have the printed card, the layer of bakers twine, and then the little birdie on top.
Here are two examples of basket cards I created: On the second one, I put a strip of ribbon around the whole card and then on the inside, I glued cut out Easter eggs so it looks like the basket is filled with eggs when the card is closed.

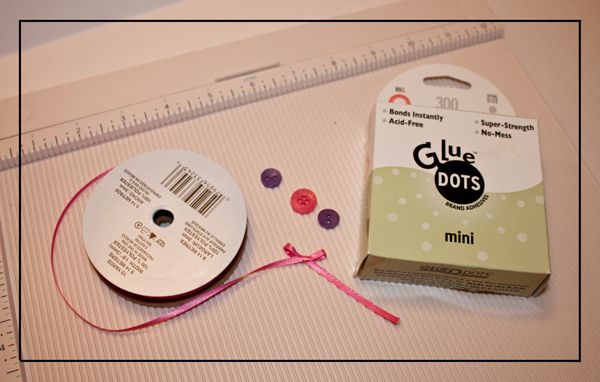
Next, I used the egg-shaped card template and decorated, printed and cut per the above instructions. On this card, I used glue dots to glue on 3 buttons. Then I added a tiny bow tied out of the ribbon you see here. It is just a very basic narrow ribbon.
As you can see, adding just these few items adds a lot of dimension.

All of the above examples were created using the digital kit Sweet Spring by WM[squared] Designs.
I'd love to see what you create using these Shaped Cards: {Spring} templates. Feel free to link me up in the comments section. Happy spring and have fun creating with these awesome card templates!
Heather (isaacsmom)


No comments:
Post a Comment